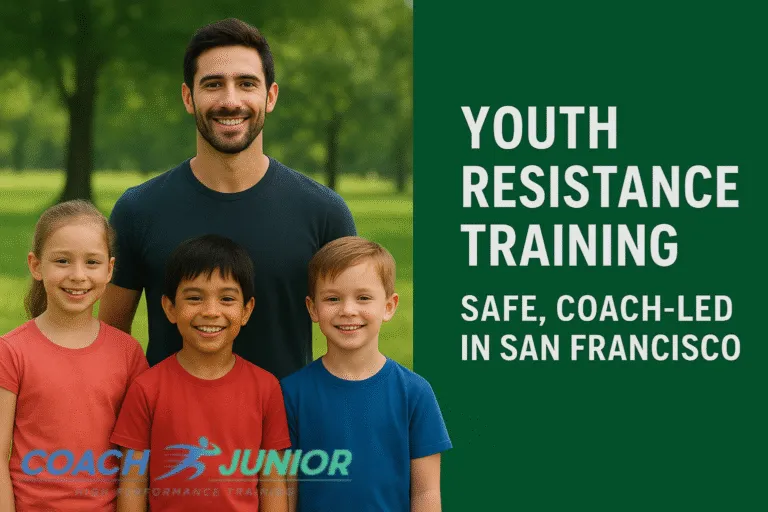
Youth Resistance Training — Safe, Coach-Led in San Francisco
Welcome — you’re in the right place if you want a friendly, evidence-minded guide to youth resistance training that actually works for real kids and real families in San Francisco. Whether you’re a parent who’s nervous about weights, a coach wanting safer progressions, or a teen who wants to get stronger for sports, this guide breaks it down clearly: what it is, how we teach it at CoachJunior, which exercises to use, and exactly how to structure safe, fun sessions.
Think of youth resistance training like teaching someone to drive: we don’t start on the freeway at 70 mph. We start in a parking lot, teach the basics, practice, and gradually build confidence. The same goes for strength — movement quality first, load later.
What is youth resistance training?
Youth resistance training is structured physical activity that uses external or internal resistance — bodyweight, resistance bands, medicine balls, light dumbbells or kettlebells, and sometimes machines — to develop muscular strength, endurance, coordination and motor control in children and teens. Unlike adult powerlifting or bodybuilding programs, youth programs emphasize movement quality, play-based learning, and gradual progressions.
Resistance vs. strength vs. conditioning
Resistance training: The umbrella term — any work performed against a resisting force. That could be a band, a med ball, or your own body.
Strength training: A focused subset of resistance training aimed at increasing the ability to produce force (how strong you are).
Conditioning: More about endurance and the ability to sustain work (think circuits, running, aerobic fitness). Conditioning is complementary to resistance training, not a replacement.
Why bother with the distinctions? Because a smart youth program balances all three — building strength through resistance work, then using conditioning to apply it in sport or play.
Common tools: bodyweight, bands, free weights, machines
Bodyweight — safest starting point for kids: squats, lunges, push-ups, planks. Portable and scalable.
Resistance bands — inexpensive, versatile, and excellent for progressive loading while keeping technique front-and-center.
Free weights (dumbbells/kettlebells) — used carefully with light loads for older kids/teens to teach proper mechanics.
Medicine balls & sandbags — great for power, rotational work and fun partner drills.
Machines — sometimes useful for late-teen athletes who need controlled loading; not necessary for most beginners.
Is resistance training safe for youth?
Yes — when it’s designed well and supervised properly. Parents worry about growth plates, injuries, and “bulking up.” Those are fair concerns. The reality: supervised, age-appropriate resistance training has been shown to be safe and to provide benefits in strength, bone health, and injury prevention. The keys are technique-first instruction, appropriate loads, and coaches who scale the work to the child.
What the experts (AAP, NSCA, ACSM) say
Major pediatric and sports organizations support youth resistance training when it is properly designed and supervised. These groups emphasize progressive loading, emphasis on form, and programs delivered by qualified adults. That means no unsupervised maximal lifts for preadolescents — but absolutely structured strength lessons, yes.
Growth plates & myths debunked
The “weights will stunt my child’s growth” tale is persistent but largely unfounded. Growth plate injuries are possible, but rare — and usually associated with poor technique, unsafe equipment, or unsupervised maximal loading. A safe youth program reduces — rather than increases — injury risk by improving strength, stability, and movement quality.

Top benefits of youth resistance training
Youth resistance training offers a bouquet of benefits — physical, performance-related, and mental/social. It’s not just about getting stronger; it’s about helping kids move better, play longer, and gain confidence.
Physical benefits: strength, bone density, body composition
Strength: Kids learn to coordinate muscles and neural patterns — early gains are often neuromuscular (better movement and control) rather than huge increases in muscle size.
Bone density: Weight-bearing/resisted movements stimulate bone growth — especially important during childhood and adolescence when bone mass accumulates.
Body composition: Combined with a healthy diet, resistance training supports lean mass, which can help regulate weight and metabolic health.
Sports performance & motor skill development
Stronger, coordinated kids run faster, jump higher, change direction more safely, and recover from collisions better. Resistance training enhances proprioception (body awareness), balance, and sport-specific power — a direct transfer to soccer, baseball, basketball, and dance.
Mental, social, and academic benefits
Regular training builds routine, discipline, and self-confidence. Group sessions improve communication and teamwork. Studies have also linked physical activity to better concentration and mood — little things that help in the classroom.
Who is ready: age & developmental readiness (not just calendar age)
Age alone doesn’t tell the whole story. Readiness is about attention span, motor control, and following multi-step instructions.
Signs a child is ready to start
Can follow 2–3 step directions reliably.
Can maintain attention for 20–30 minutes.
Can demonstrate basic movement control (run, hop, squat).
Shows interest and enjoyment in active play or organized sports.
If those boxes are ticked, a structured program (play-based initially) is appropriate.
Age-specific sample focuses
Ages 6–9: Playful movement, bodyweight fundamentals, balance, basic game-like strength drills.
Ages 10–13: Introduce bands, light medicine ball work, basic free-weight mechanics with very light loads, movement patterns (hinge, squat, push, pull).
Ages 14–18: More formal strength progressions, individualized loading, sport-specific power and speed work (if technique and maturity are there).
Medical clearance is recommended for kids with chronic conditions; otherwise, most healthy children can start progressive resistance work.
How We Do It at CoachJunior in San Francisco
At CoachJunior, we blend kid-first coaching with sport science. Our sessions are efficient, fun, and geared to SF families — flexible schedules, outdoor options, and small groups.
Typical session structure
Warm-up (5–10 min): dynamic movement and activation games.
Skill & movement practice (10–15 min): break complex moves into small parts — e.g., hip hinge drills before a deadlift.
Resistance block (10–20 min): circuits using bands, bodyweight, med balls, or light free weights.
Fun finisher / game (5–10 min): keep it playful — obstacle course or relay.
Cool-down & coach check-in (3–5 min): brief feedback and homework cue.
We alternate focus days (lower body, upper body, plyometrics) and keep volume moderate — 2–3 sessions/week for beginners.
Coach : child ratio and supervision
Safety and learning scale with supervision. For kids under 12 we prefer ratios no larger than 1:6; for teens, 1:8 can work if coaches have more experience. All sessions allow parents to observe, and we provide quick technique updates after each class.

Top Youth Resistance Training Exercises — Coach-Approved List
Below are the most reliable, scalable, kid-friendly movements. Each can be regressed or progressed to fit ages and ability.
Bodyweight Basics (Beginner)
Box/bench sit-to-stand — teaches hip and knee coordination.
Bodyweight squat — build depth and control before adding load.
Wall/incline → knee → full push-up progression — upper-body pushing mechanics.
Plank & dead-bug — core stability basics.
Walking lunges — unilateral strength and balance.
Resistance Band Favorites (Portable & Safe)
Band rows — scapular strength and posture.
The band resisted squats — adding gentle tension for kids mastering depth.
Band deadlifts/hinge — teach hip hinge without heavy loads.
Band anti-rotation holds — core stability for rotational sports.
Light Free-Weight Progressions (Dumbbells & Kettlebells)
Kettlebell deadlift (light) — safe introduction to hinging.
Dumbbell goblet squat — adds load while keeping an upright trunk.
Dumbbell farmers carry — core and grip in a functional lift.
Single-arm dumbbell row — unilateral upper-back development.
Fun Power & Core Drills (Medicine Ball, Throws, Carries)
Medicine ball chest pass (partner) — explosive upper-body power.
Rotational med ball throws — core power for throwing sports.
Short bounding/small box jumps — teach triple-extension safely for teens.
Medicine ball slam — energy release and fun.
How a safe youth resistance session is structured
Safety = system + coaching cues + progressions.
Warm-up & mobility (5–10 minutes)
Start with dynamic movement: animal walks, A-skips, leg swings, band pull-aparts. Warm-up is movement rehearsal and neural priming — short and specific to the session.
Skill & movement practice (technique first)
Break down complex movements. For a deadlift, practice hip hinge with a dowel, then kettlebell deadlift, then a light dumbbell. Repetition with feedback beats heavy loading.
Resistance sets: progression, reps, and load
Beginners: 1–3 sets of 8–15 reps with a focus on tempo and control.
Progression: increase reps, sets, or load by small steps (5–10%) once technique is consistent.
Avoid training to failure. For kids, leaving a rep or two in reserve is smart coaching.
Cool-down & recovery
End with light static stretches for major muscle groups, breathing, and a quick conversation: what went well and what to try next. Emphasize sleep, hydration, and a protein-rich snack post-session.
Program design: sample 8-week beginner plan (downloadable lead magnet idea)
Want a simple, practical road map? Train 2× per week and follow these week-by-week focuses. (Offer: CoachJunior often packages this as a downloadable PDF with video demos.)
Week-by-week progression (overview)
Weeks 1–2: Movement basics, mobility, low-volume circuits (bodyweight focus).
Weeks 3–4: Add band resistance and introduce med ball work; increase circuit rounds.
Weeks 5–6: Introduce light dumbbells/kettlebells for hinge and goblet squat; add single-leg work.
Weeks 7–8: Build consistent volume and small increases in load; add power drills for older kids.
Equipment-free starter session (for home)
Warm-up: 3 min (skips, arm circles, leg swings)
Skill: 3 × 8 sit-to-stand from a chair
Circuit: 2 rounds — 10 bodyweight squats, 8 incline push-ups (hands on bench), 12 glute bridges, 20s plank
Cool-down: child-friendly stretching and praise
This session fits in 25–30 minutes and requires zero equipment.

Common mistakes and how CoachJunior fixes them
Poor supervision & bad technique
Mistake: Big classes with little coaching.
Fix: Small groups, high-touch cueing, and immediate corrective feedback. We demonstrate, guide hands-on when appropriate, and give simple cues kids remember.
Too much weight, too soon
Mistake: Adding load because “more is better.”
Fix: Focus on progression variables: reps, sets, tempo, or complexity. Load only increases after flawless technique.
One-size-fits-all programming
Mistake: Giving every child the same program regardless of age, sport, or ability.
Fix: Individual scales — different regressions and progressions for each child. A 9-year-old’s “strength day” looks different from a 16-year-old’s.
How CoachJunior runs youth resistance training in San Francisco
Coach credentials & kid-friendly coaching style
Our coaches are certified, experienced with youth, and trained in behavior-based coaching — turning corrections into games and making technical cues simple and memorable. We prioritize safety certifications, pediatric first aid, and ongoing professional development.
Class formats: small group, 1:1, outdoor sessions
Small group: 4–8 kids, focused progressions, social interaction.
1:1 coaching: for targeted technical development or rehab.
Outdoor sessions: ideal in SF — we use parks like Dolores Park and Crissy Field when weather and logistics allow.
Safety protocols & parent communication
We perform brief pre-screen checks, maintain coach:child ratios, and send quick post-session notes to parents (what was learned, wins, and a 1-line homework cue). For new clients we offer trial sessions so parents can watch and ask questions.
Where to train in San Francisco & what to bring
Neighborhood options (Mission, Sunset, North Beach, etc.)
San Francisco families want convenience. Popular training spots we use or recommend:
Mission / Dolores Park — central, vibrant, great for morning sessions.
Sunset / Golden Gate Park — ample space and quieter mornings.
North Beach / Washington Square —walkable, neighborhood-friendly.
Crissy Field / Marina — beautiful views and great for sprint/power work.
We also offer backyard or in-home sessions for families who prefer private coaching.
Gear checklist
Comfortable athletic clothes and layered options (SF mornings can be cool).
Clean trainers with good grip.
Water bottle and small snack (banana, yogurt).
Optional: light resistance band, small med ball (2–4 lb for younger kids), towel.
Conclusion
Youth resistance training is a practical, safe, and powerful way to help kids develop strength, movement skill, and confidence — especially when delivered by qualified coaches who prioritize technique, progression, and fun. In San Francisco, families benefit from outdoor training options, flexible scheduling, and programs that respect busy lives. Start small, emphasize movement quality, and choose a coach or program that communicates clearly and scales work appropriately. Do that, and you’ll give your child training they actually enjoy — and that helps them thrive.
FAQs
What are the benefits of resistance training for youth?
Youth resistance training strengthens bones, tendons, and stabilizing muscles, reducing injury risk and improving overall movement quality. It boosts bone density, enhances athletic performance, supports healthy growth, and helps kids develop strength, coordination, and confidence in both sports and everyday activities.
Can a 10-year-old do resistance training?
A 10-year-old can safely begin resistance training if they show emotional maturity and can follow instructions. With proper supervision, technique-focused sessions, and age-appropriate loads, kids can build strength, movement skills, and confidence without harming growth or joints.
What age can you start resistance training?
Children can start basic strength training around ages seven or eight, provided they can focus, follow directions, and maintain proper form. Early training emphasizes bodyweight movements, balance, and coordination—not heavy loads—helping young athletes move better and reduce injury risks.
What are six guidelines teens should follow for resistance training?
Teens should prioritize proper technique, start with light weights, progress gradually, train all major muscle groups, avoid maximal lifts, and always work under qualified supervision. A balanced program with warm-ups, cool-downs, and safe progression supports long-term strength development.
What happens to your body when you start resistance training?
Resistance training triggers muscle breakdown followed by repair, leading to stronger, more resilient muscles. As the body adapts, strength, coordination, and endurance improve. Metabolism increases, posture often gets better, and overall physical performance rises as training becomes consistent.
Why was resistance training once discouraged for children?
Resistance training was previously discouraged due to fears it might damage growing bones. Research now shows it’s safe when supervised, technique-focused, and appropriately scaled. Properly designed programs protect joints, build strength, and support healthy development without harming growth plates.